*This post is brought to you by The Home Depot.
Y’all. Are you ready for this jelly?
Image may be NSFW.
Clik here to view.
(I don’t know why I said that. I’m sorry.)
Okay, so as I mentioned last week, I’ve teamed up with The Home Depot and will be co-hosting several of their DIY Workshops across the country this year. For this month’s workshop (which will be happening THIS SATURDAY!), I’ll be in Louisville, Kentucky teaching UK and Cards fans alike (I don’t discriminate) how to build that crazy awesome vertical planter in the photo above.
Want to join in on the fun? It’s free and these workshops are happening all over the country! And get this: there will be giveaways. Oh yes. You don’t want to miss this shindig. It will be epic. Click here to register at your local Home Depot.
In preparation for this workshop, I built my own version of this project. Since I don’t have a fence, I needed to build one that is free-standing. Here’s what I came up with:
Image may be NSFW.
Clik here to view.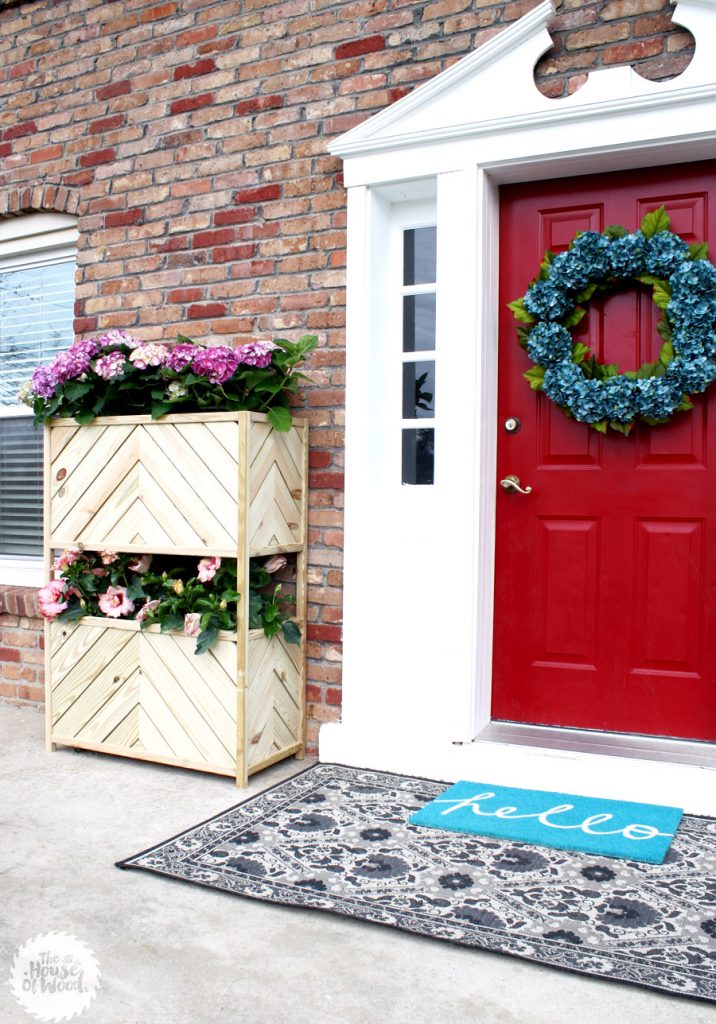
I can feel you judging me. I am aware that my planter looks nothing like the planter in the first photo. Listen, I am an artist and I’m claiming poetic license. That’s my story and I’m sticking to it. Also, we’ve already established that I am horrible at following directions.
Image may be NSFW.
Clik here to view.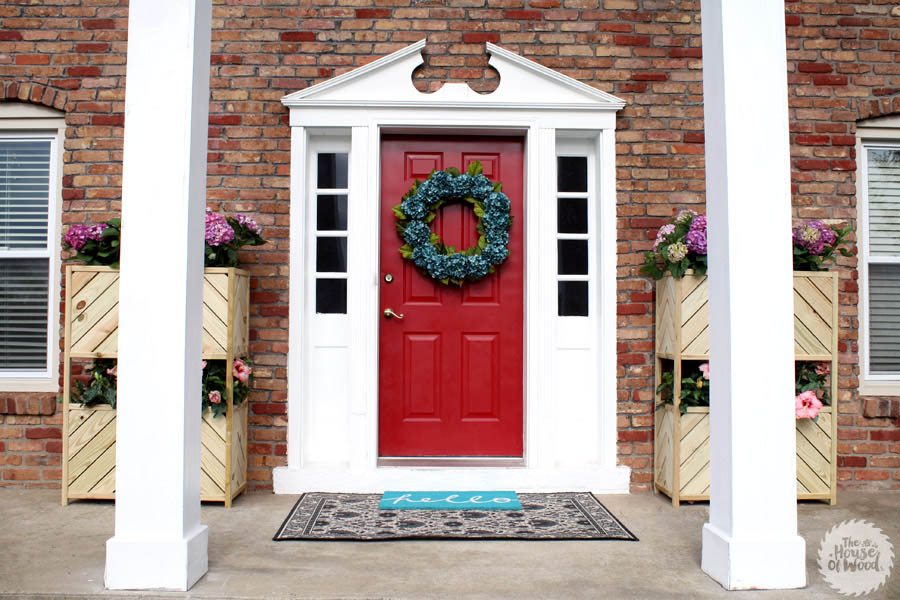
And on an unrelated note, I apparently have a slight obsession with hydrangeas.
If you’d like to build my version, I’ve drawn up the step-by-step plans for you!
Click here to download the PDF plans for this Two-Tiered Vertical Planter.
First, I built the frame. I used pressure-treated lumber for this project since these planters will be living outdoors. Cedar and redwood are also great choices for outdoor use since they are naturally resistant to decay.
Image may be NSFW.
Clik here to view.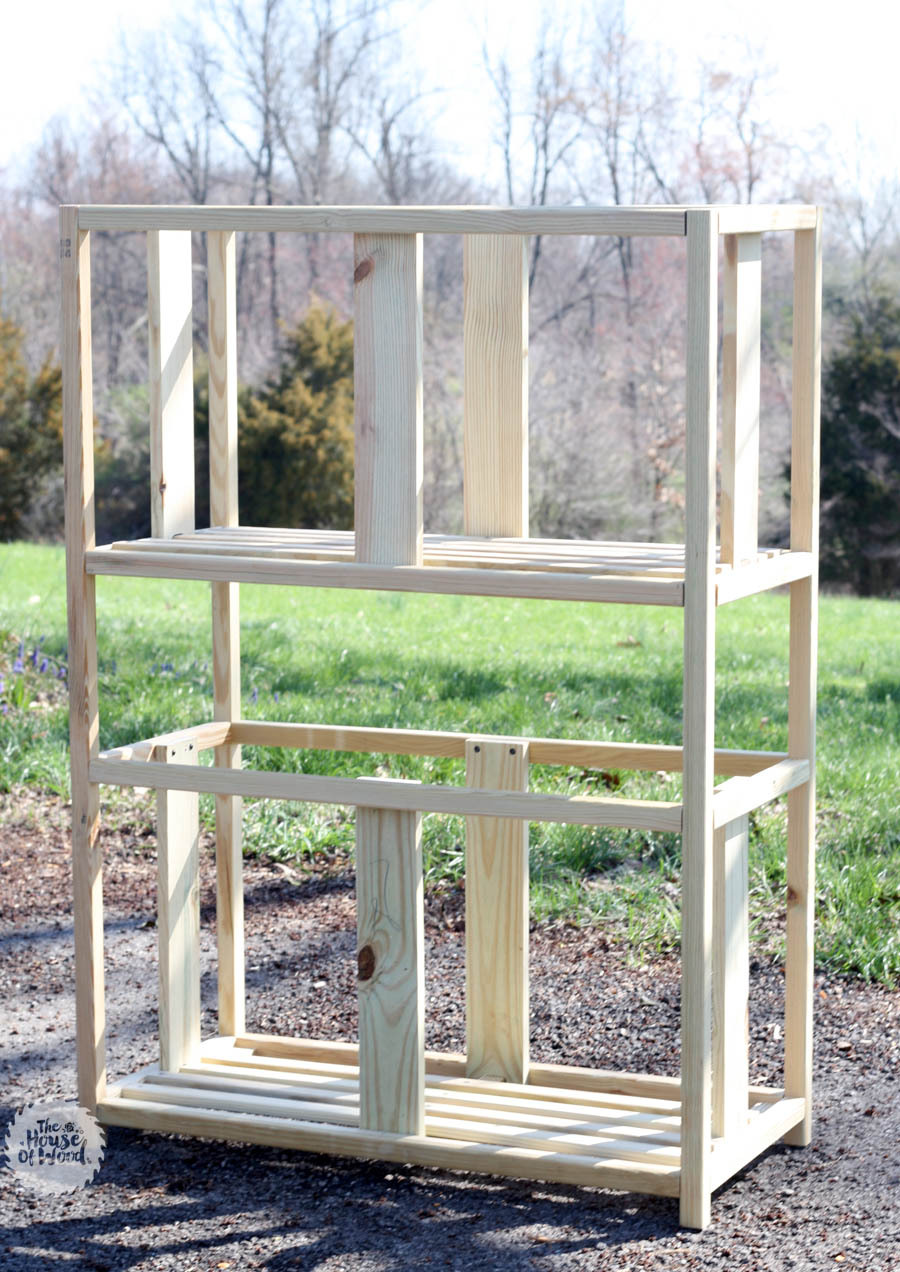
Then I cut and attached the pieces to form the diagonal pattern on the front, back, and side panels. I provided measurements in the plan, however, I recommend using these dimensions only as a loose guide, and just measuring and cutting as you go for the most precision.
It was incredibly tedious to cut all those different pieces, but there are no funky angles. They’re all cut at 45º, so there’s that. But considering that I was on a time-crunch, I was seriously kicking myself as I went back and forth, measuring and cutting, re-measuring, and re-cutting… too long, too long, too long, too short. Doh! *forehead slap.
If you happen to cut a piece that’s too short (like I did numerous times), have no fear! You can still use that scrap for the next, shorter board. I hardly had any lumber go to waste this way, despite all of my mistakes.
Image may be NSFW.
Clik here to view.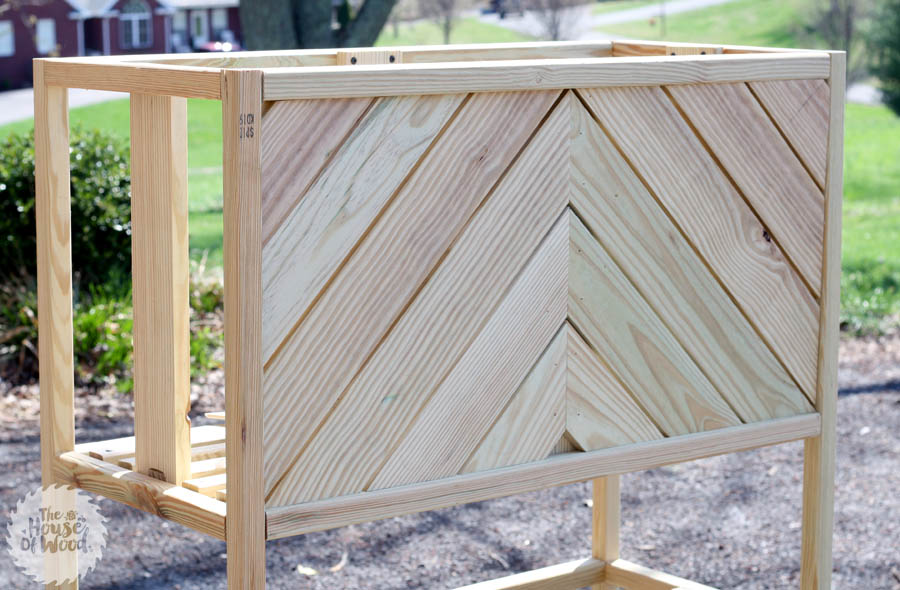
Also, when you’re measuring and cutting those diagonal pieces, take note: some boards will be trapezoids while others will be parallelograms. Oh, hello 7th grade geometry class, my old nemesis. I hated you then and I hate you now. Again, it’s best to just measure, mark, and cut as you go.
Working with pressure-treated pine is a bit different from working with regular pine, spruce, or other softwoods. Because the lumber has been treated with chemicals to make it more durable for outdoor use, you’ll find that newly-purchased pressure-treated wood is heavier, denser, and will feel somewhat damp to the touch.
Here are a few tips on working with pressure-treated lumber:
Tip #1: If you plan on painting or staining it, be prepared to wait several weeks or even months for the wood to dry out first. Otherwise, the stain won’t absorb and the paint won’t adhere properly.
Tip #2: Always pre-drill any nail or screw holes within an inch of the end of the board to minimize the risk of splitting the board. Even if it doesn’t split at first, there is a risk that it will do so later as the wood dries and shrinks.
Tip #3: Use galvanized or stainless steel screws and nails suitable for exterior use.
Image may be NSFW.
Clik here to view.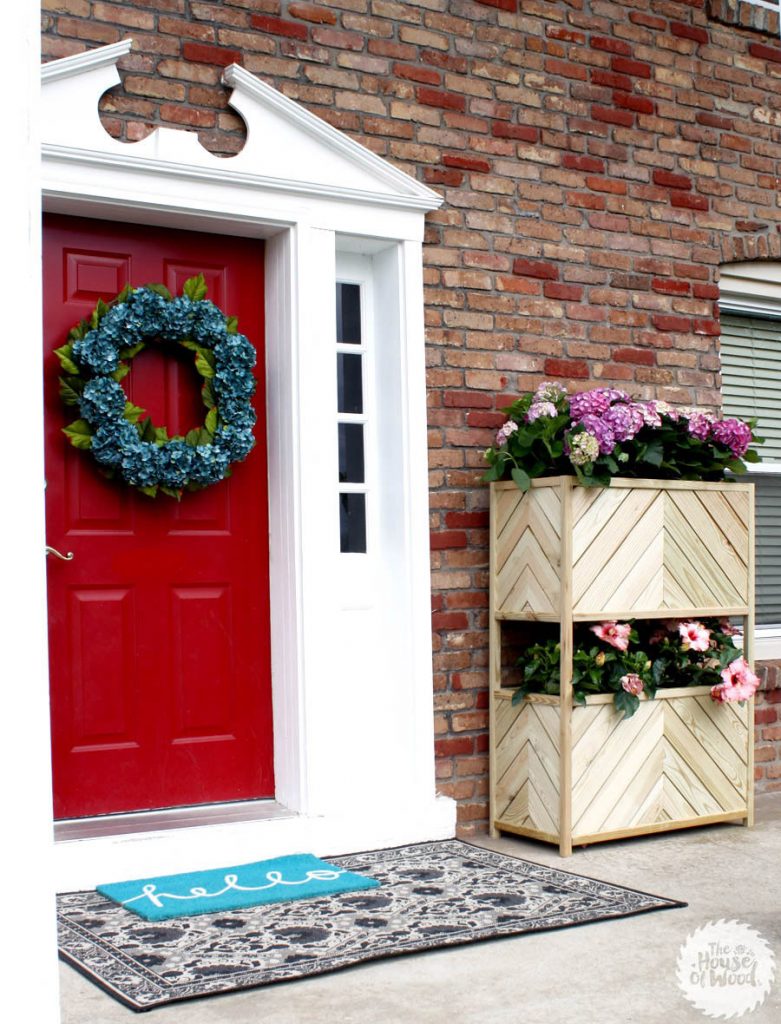
Even though this project was a little time-consuming, the end result is totally worth it. How about y’all? Do you have any outdoor gardening projects on your To Do list?
Image may be NSFW.
Clik here to view.
Image may be NSFW.
Clik here to view.
Don’t forget to register to attend this DIY Workshop and learn how to build a vertical planter. Louisville friends, we are going to rock this thing. See you out there.
Where: The Home Depot, Store #2305
13031 Westport Road
Louisville, KY
When: Saturday, April 11th
Time: 10:00am – 11:30am
Cost: FREE!
Image may be NSFW.
Clik here to view.
Feel free to pin and share this project! Also, if you build this planter, I’d love to see it! Share it on Instagram, Twitter, or Facebook and use the hashtag #DIYWorkshop.
Image may be NSFW.
Clik here to view.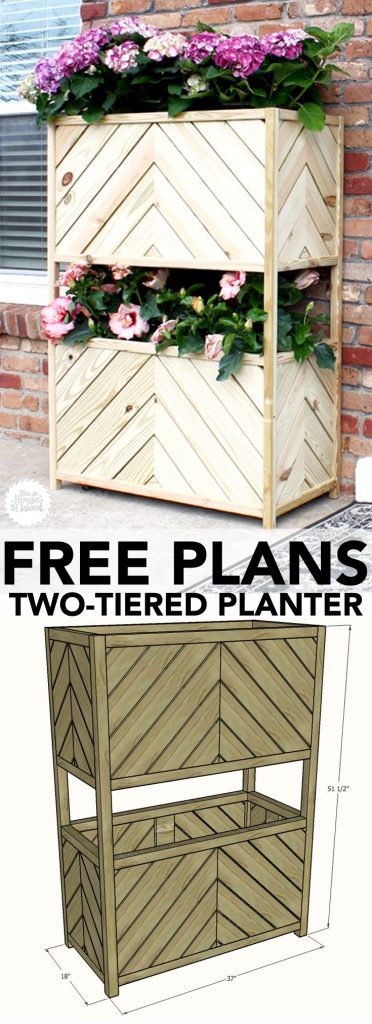
*I acknowledge that The Home Depot is partnering with me to participate in this Workshops Program. As a part of the Program, I am receiving compensation in the form of products and services, for the purpose of promoting The Home Depot. All expressed opinions and experiences are my own words. This post complies with the Word Of Mouth Marketing Association (WOMMA) Ethics Code and applicable Federal Trade Commission guidelines.
The post How To Build A Two-Tiered Vertical Planter appeared first on The House of Wood.