*This post is brought to you by The Home Depot.
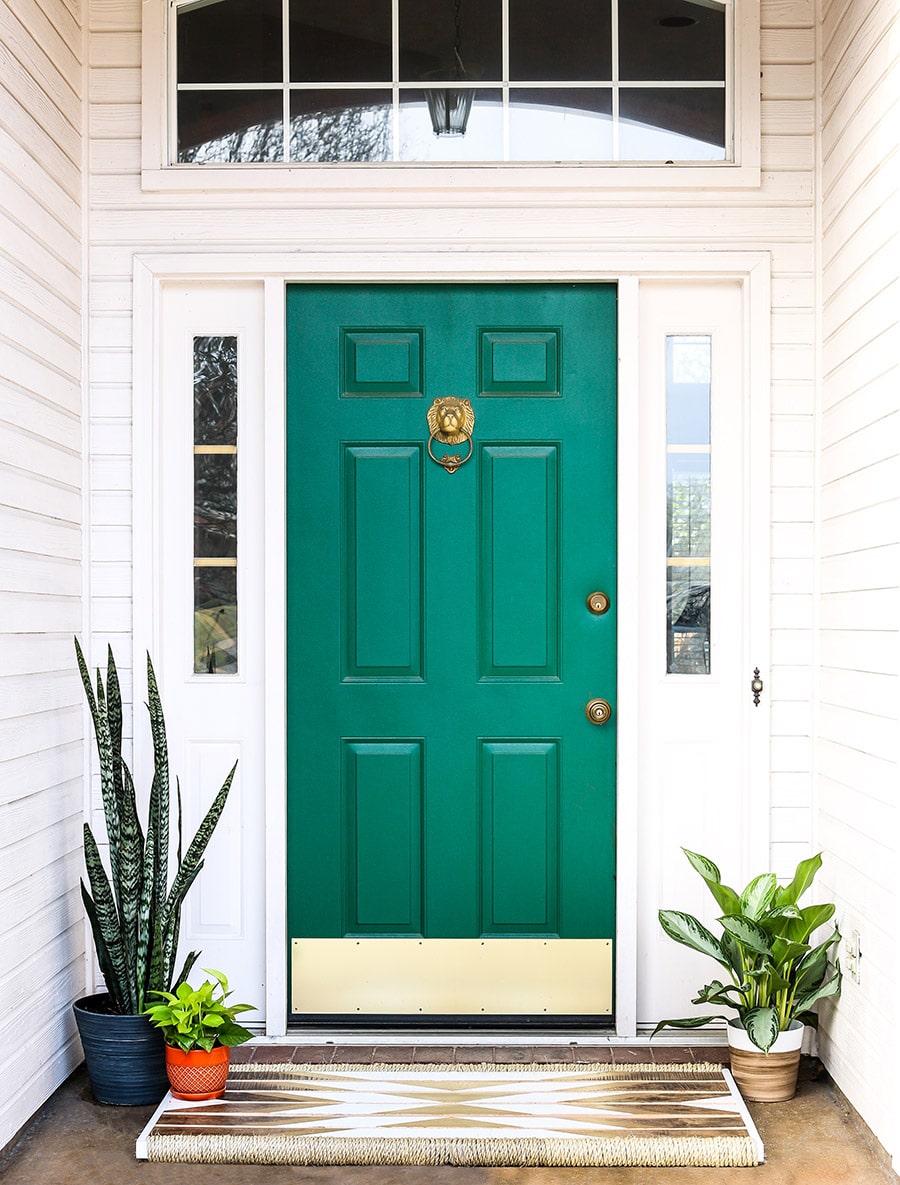
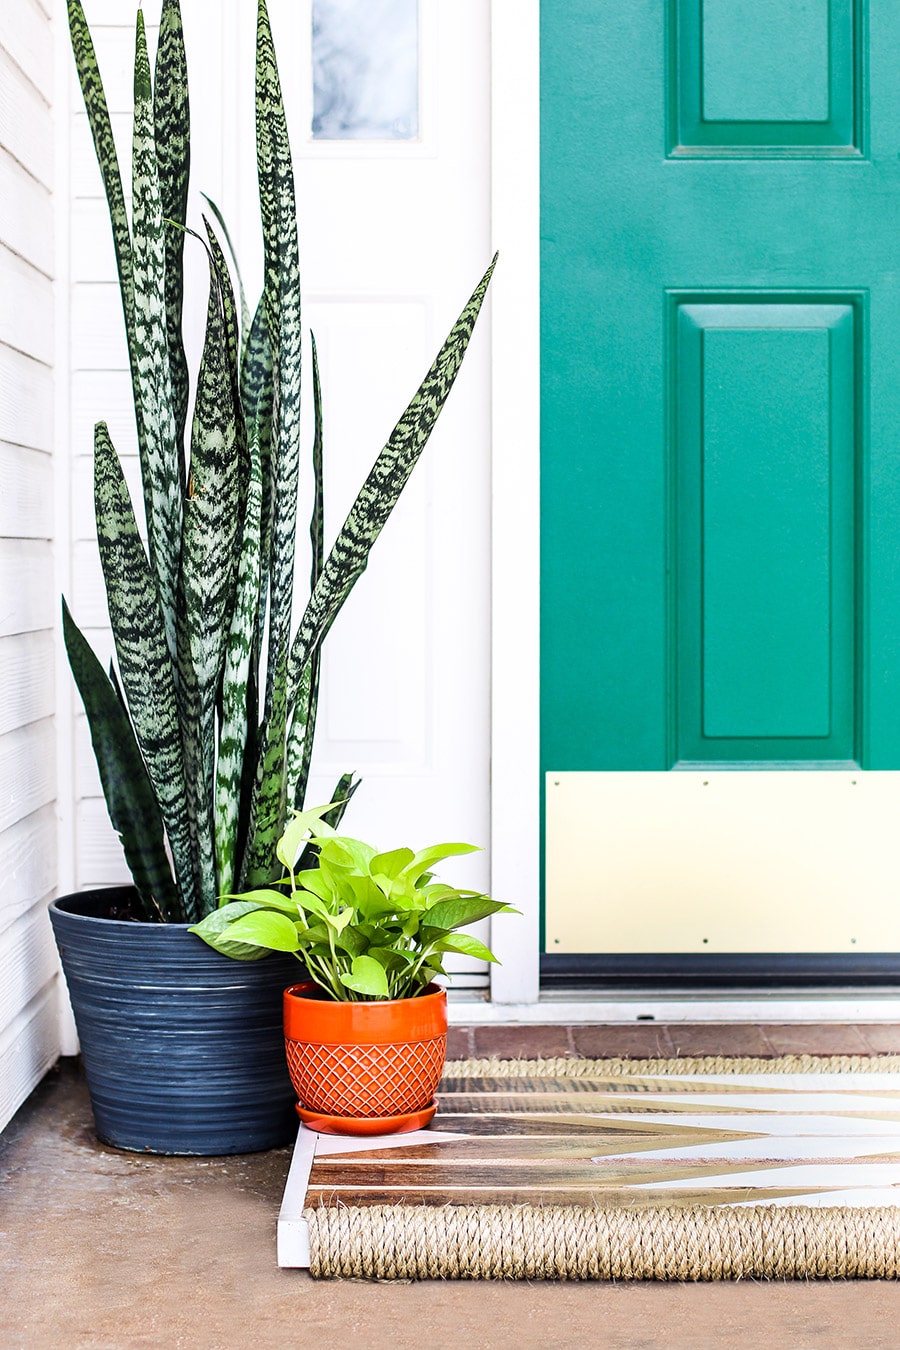
Hello and happy Monday friends! I’m back to share my version of The Home Depot DIY Workshop’s Wooden Doormat! As you can see, I’m kinda diggin’ the tribal trend.
Aw, who am I kidding? I’ve been riding that train since the early 90’s when I got that tribal tattoo on my right bicep.
(Okay, not really.)
Check out my little tribe of ladies who can build like a boss:

- Katie, Bower Power Blog
- Rachel, Shades of Blue Interiors
- Aniko, Place Of My Taste
- Chelsea, Making Home Base
Did you see their versions of this DIY Wooden Doormat? Click the links above to take a peek.
Want to learn how to build a DIY Wooden Doormat? Mark your calendar, bring your friends, and attend the DIY Workshop at your local Home Depot store. The workshops are free and fun!

The Home Depot #DIYWorkshop
Saturday, March 26, 2016
10:00 a.m. to 11:30 a.m.
The Home Depot offers Workshops at all of their store locations. There are three types of Workshops: Do-It-Yourself (DIY), Do-It-Herself (DIH), and Kids. I love that Home Depot offers these free workshops because folks can learn how to build home decor projects, make easy home repairs and renovations, and safely operate tools through the demonstrations and step-by-step instructions.

I put my own spin on this DIY wooden doormat. Want to know how I made it? Let’s get started.
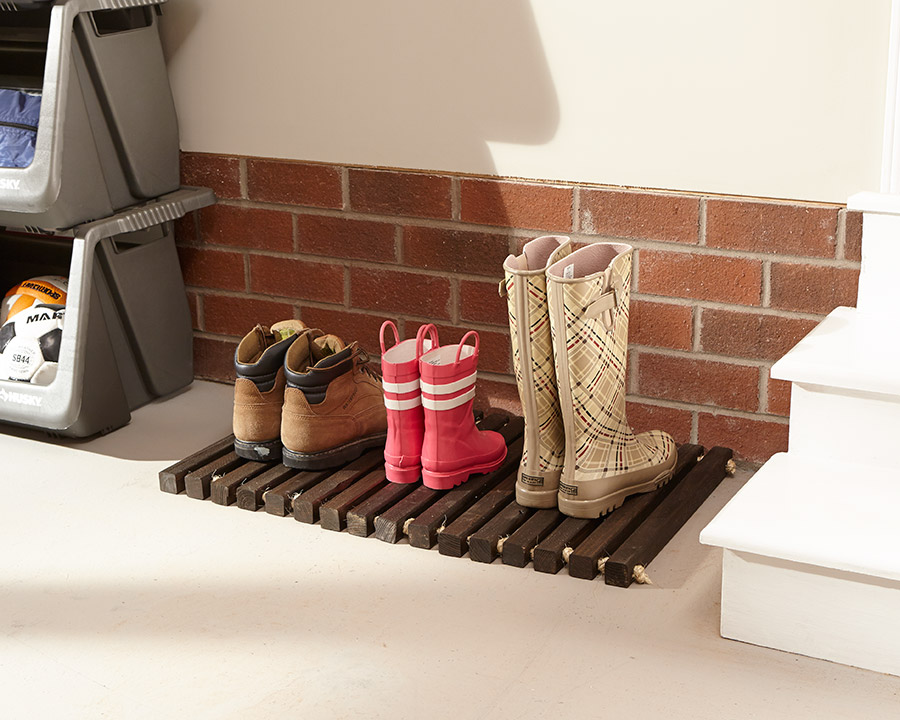
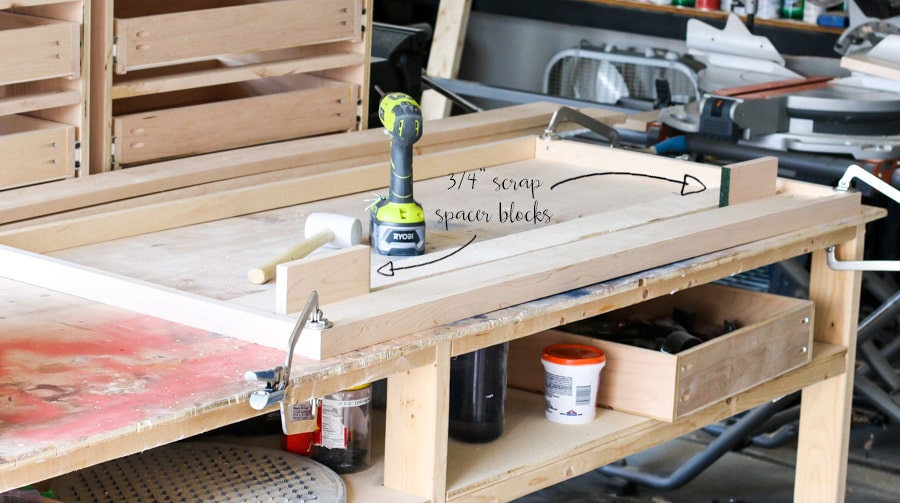
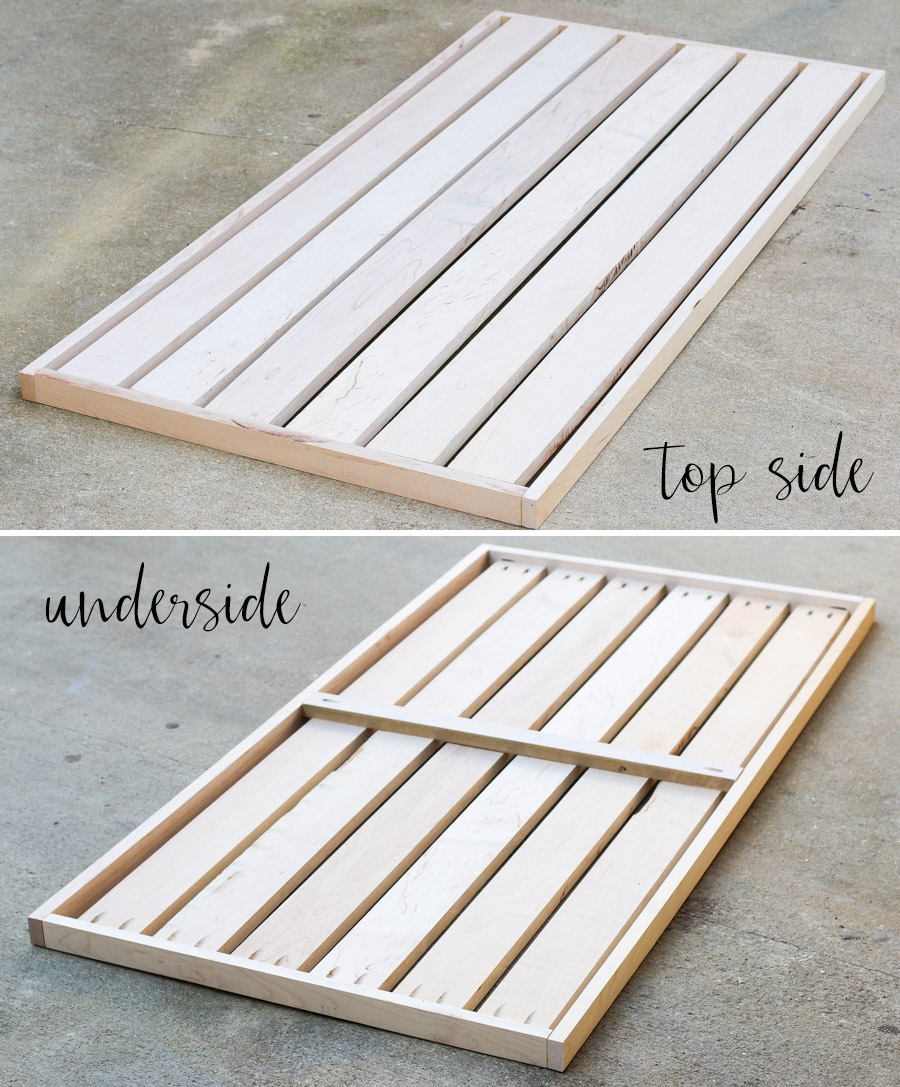
Build the frame first. I drilled 3/4″ pocket holes and constructed the frame with 1-1/4″ pocket hole screws and wood glue. Then I attached the slats with pocket screws, using a 3/4″ thick scrap piece of wood to act as spacers, to keep the slats evenly spaced.
After all the slats were attached, I added a 1×2 board underneath for added support.
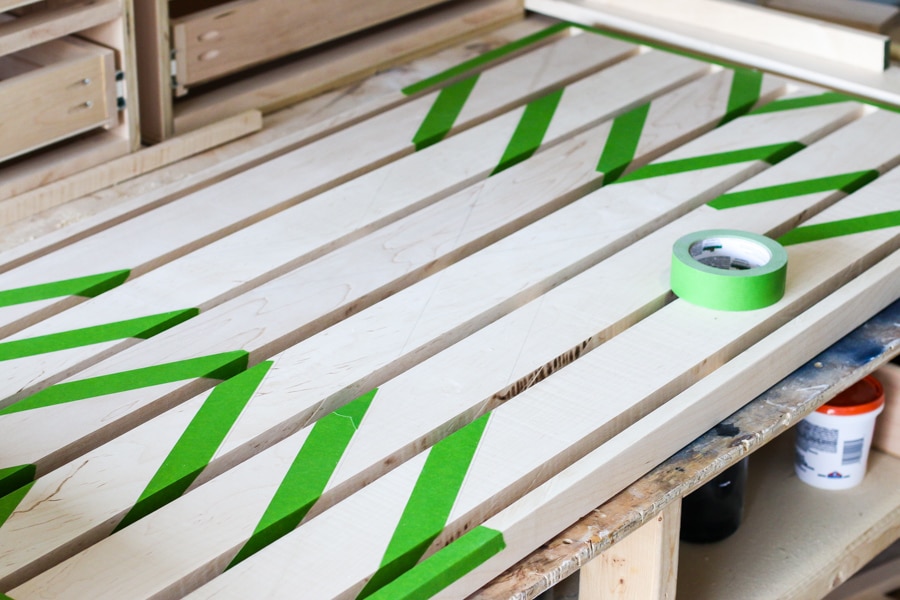
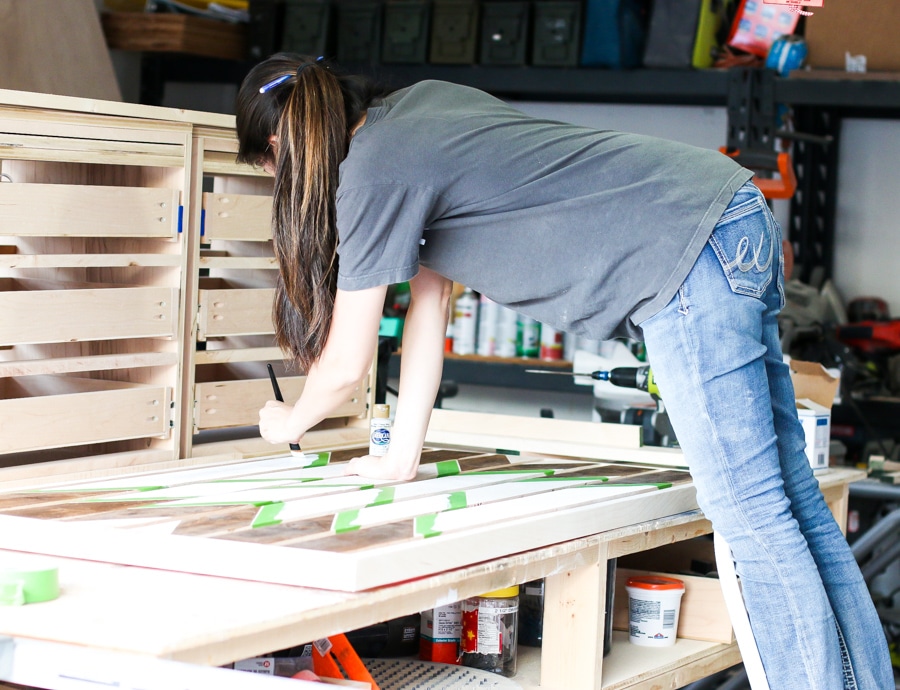
Next, I sanded the rough edges of the wood then taped off my design. I stained the doormat first, then painted the white and metallic gold on afterwards with some acrylic craft paint.
Of course, I sketched up my design first because I am a giant nerd.

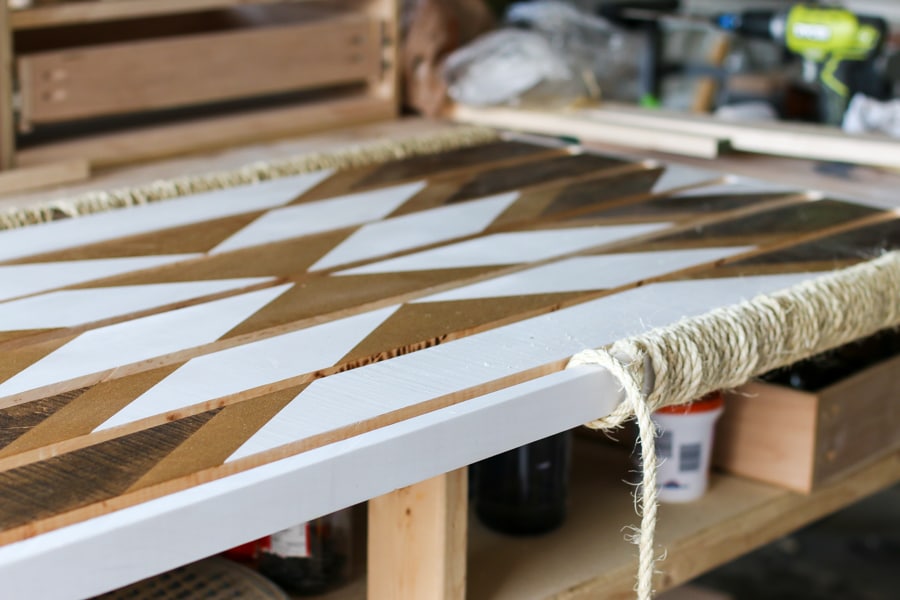
After the paint and stain dried, I applied three coats of exterior-grade polyurethane. Finally, I wrapped 3/8″ sisal rope around the top and bottom parts of the frame. I used 3 packs of 50-foot rope.
What do you think? Are you digging the tribal trend too? I love how it turned out – it adds a hipster edge (not in a cheesy, skinny jeans for men, kind of way) to our front door.
Be sure to register to attend the DIY Workshop in your local Home Depot store!
CLICK HERE TO REGISTER
Want to see even more cool customizations of this DIY Wooden Doormat?
- That’s My Letter / Ciburbanity / Brooklyn Limestone / Wills Casa / The Bold Abode
- Build Basic / Her Toolbelt / Addicted 2 DIY / My Love 2 Create / Sawdust 2 Stitches
- Fix This Build That / Sawdust To Sequins / Build It Craft It Love It / DIY Huntress / Glued N Screwed
- Remodelando La Casa / The Kim Six Fix / Heathered Nest / Creatively Living / Batchelors Way
*I acknowledge that The Home Depot is partnering with me to participate in this Workshops Program. As a part of the Program, I am receiving compensation in the form of products and services, for the purpose of promoting TheHome Depot. All expressed opinions and experiences are my own words. This post complies with the Word Of Mouth Marketing Association (WOMMA) Ethics Code and applicable Federal Trade Commission guidelines.
The post How To Make A Wooden Doormat appeared first on The House of Wood.